Sunday, December 31, 2006

Introduction to APEX

I have wanted to do an IG Dread since my friend Finnigan and I discussed that the Heavy Sentinel (http://mrskinner-igheavysentinel.blogspot.com/) was not an IG Dread. Actually I was switching back and forth in my discussions with him and he insisted I pick a descriptor. As that project is coming to a close, pretty much painting left I have been starting to look for other conversions. I got the bug again when the guys and or girls at Boot Camp (http://s4.invisionfree.com/Boot_Camp/index.php?) started a Heavy Sentinel/ IG Dread competition. Since I was already finishing my Heavy Sentinels I thought that that was a tad unfair and decided to build the IG Dread. I will be working on the Peregrine Falcon after this (http://mrskinner-igflyer.blogspot.com/).

APEX: WS-3, BS: 3, Front: 12 Side: 11 Rear: 10

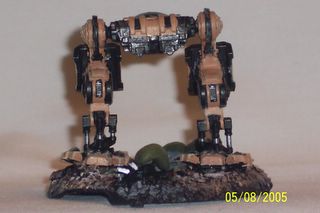
The Anti-Personal Equipment eXtention was designed to fill a notable gap in the Imperial Guards available equipment. The APEX was to fill the disparity between the not so flexible manned heavy assault weapons, the weapons platforms of rolling steel tanks, and the lightly armored and sometimes ineffective Sentinel. The APEX conforms to the IG principles of more is better. The APEX system can carry an array of trench warfare armament but this article concentrates on the APEX utilizing HellWhole weapon system.

The APEX is based on the flexibility of the IG Sentinel. The legs and feet of the system have been increased in strength to increase the overall strength of the system.

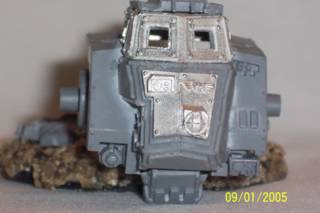
The cab has been strengthened with additional armor on the front and sides.

The weapons system feeds off a G7 fusion power plant housed externally at the back of the cockpit. This set up was done for several reasons:
· Protection of the power source.
· Heat dispersion
· Counter balance to the cockpit armor weight.

HellWhole : 36"R, S6, AP 3, Sustainable Rapid Fire.

Saturday, June 10, 2006

2006-06-10 IG Dreadnaught

Since I have last posted much has changed. I have relocated to a new job and new area. The unpacking and organizing is still progressing going on three months. It is not the big things that need to be placed but the small, like my modeling tools and models.

I have also purchased a new camera and it will take some getting used to.


I finally made a decision on my next step. It is a step back but a good step. When I received my ForgeWorld dread part I was very disappointed by the overall quality. All the previous GW Dreadnaught weapons are able to be attached with friction resistance to the Dreadnaught body. The ForgeWorld part where the dreadnaught body inserted into the weapon was very loose. For reasons I can not explain just gluing the parts did not seem like a viable solution. My solution was something I have been reading about on several sites:
Games Works Black Gobbo, Hobby Hawk, and the modeling sites: Boot Camp and Work In Progress to name a few. I used magnets, not just any magnets but Rare Earth Magnets.

I ordered my magnets from
K&J Magnetics. They have a wide variety and from what I can tell so far great prices on a great product. I purchased 100 D21 and 25 D41. I will detail the usage later in the entry. I spent sometime about two weeks before ordering measuring, calculating and thinking about what I wanted from the modifications. I chose the D21 because of its general good usage and easy size to fit into tight spots. I chose the D41 first I wanted something with pull and second by grabbing a drill bit for size comparisons decided it was not too big. I received my $20 order last week and was again thrilled. I spent some time over the week visualizing my modification for the Heavy Sentinel.

I need to get the right tools especially something to hold my large drill bit. I was so enthused to be working on the models again that even though I tore up my fingers holding the drill bit, I kept drilling. I drilled into the weapon making space for one magnet and some green stuff.


On the body of the dread I cut off the stubs that are used as friction connections. I gl
ued the magnets where the stubs had been. I used two magnets stacked to create a stronger bond. Now the weapon stays attached and in the position or elevation I set it. I also ensured that the poles for were the same so I can switch these weapons with other dread weapons I create or use in the future.


Monday, August 15, 2005

2005-08-14 IG Dreadnaught

Time flies when filled with work.

It has been about a month since I put in a late night of modeling. I have not however forgotten what I was doing pulling down my model every now and then to reflect on my goal and plan out my evening.

I have finally received the final part for my IG Dread Apex. I hopefully will be basing it this week and dry brushing through the weekend.

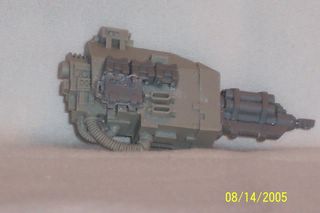
I received the right side missile launcher from Ted. I had a lot more rebuilding and cleaning up than I would have assumed reading all the praises of Forge World. First it had a huge block on the backside which I would have assumed would have been removed. I cut this piece off. I had to clean off a lot of residual lines and the bit in the pipes part. Since this is not a three part assembly like GW I did not have a lot of clean up freedom. I also noted that some of the details are different that the GW version. I will be able to model some of the parts but others I do not know and will have to see.

I have removed the missile heads and little bars that are on the front. When I had made the left side Gatling gun assembles I made the right in anticipation of replicating that weapon. I glued the laser gun barrel end into the end of the Gatling assembly. I then glued this assembly to the missile launcher.

I then attached three of the IG Sentinel toes I had in my bits box to represent the quick discharge batteries. I also attached the lower part of a IG troop Vox caster backpack.


Another complaint the part does not fit snug onto the dread joint. To attach the weapon assembly I am going to go and find some rare earth magnets.

Erik

Monday, July 11, 2005

2005-07-08 IG Dreadnaught

I talked with Ted this Friday. Ted will be attending the Windy City Gamesday(Chicago). He will be picking up the ForgeWorld parts there. It looks like in the future if I do not want to pay for shipping and such I will have to be patient.

Thanks Ted.

Erik

Monday, May 09, 2005

2005-05-08 IG Dreadnaught

This work was actually done Friday evening. My wife has extended Mother’s Day to be more resembling of Christmas. There is the week before Mother’s day (all of my to-do lists are reviewed and prioritized. The menu for the weekend is set. Cleaning assignments are laid out. Any extra curricular activities, a trip to the zoo, are planned etc…) Friday starts the Mother’s day weekend, my wife retreats to her lair to dictate to the rest of the family. Amazingly I cook dinner and get everyone to bed by 8:30 and the paint bug hit me. Actually I have a tank conversion brewing and wanted to finish my Heavy Sentinel and APEX before I start.

I had painted the base tan several weeks ago and the pictures did not please me. I was working at the local Rouge Trader (Victory Games
http://www.victory-games.com/) and got some good advise from local painters.

The color however, has grown on me and I intend to stick with it. I used a bleached bone to weather the edges giving the APEX a used appearance. I used skull white to help highlight worn corners then putting a spot of Mithril Silver to show rubbed down to the metal.

The whole model and paint scheme is comming together now that I am getting to more and more details.


I have finished the base for the most part. The afore mentioned hobby shop does not do flock and stuff so unless I make it to the local and laughable Hobby Lobby this will probably be it for the base. I did not put in a lot of detail and great painting. I just don’t or can’t picture a lot of stunning detail on a battle field.

I did however get a great lesson in undercoating. The sand bags on the base are made from spare green stuff. I then painted them Cadian Green, Cammo Green, and up to a highlight of Bleached Bone. Bleached Bone is quickly becoming my highlight, worn look of choice. The green base of the green stuff helped in the overall look of worn green sandbags.

It is hard to see but I used Mithril Silver to edge some of the building structure or bent steel. I was considering using a mix of Orange and Brown to get a rust color but I decided to give this a new destruction feel.


I am still waiting for the final parts to finish the right side weapon. I do not expect them until possible late July. That means this goes on the shelf, next week or so I will be concentrating on my Heavy Sentinels.


Erik

Sunday, March 20, 2005

2005-03-20 IG Dreadnaught

Next weekend I am off on holiday so this is it for the competition. Three months went fast. I will continue to finish this IG Dread when my parts come in.

I used a mix of bleach bone and Bestial Brown to make a tan color. My paints are old and when the paint dried I saw the results of this. The paint more gooped the model than covered, this is odd since it initially covered so well with three or four thin coats. Damn, I might drop them in brake fluid and start over. I am going to try highlighting and such first then we shall see.

I also starting to apply metallic looks to the bare areas.


Erik

Sunday, March 06, 2005

2005-03-06 IG Dreadnaught

Well the night was long so I tried to just finish up what I had. Today I talked to the local GW Rouge Trader Store and Ted informed me that my order for my right side missile launcher would probably not arrive by the middle of March. That information more or less put me out of the competition.

Oh well. I have applied black wash to everything trying to avoid where the major components will be connected with super glue.

The base


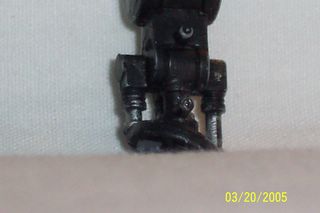
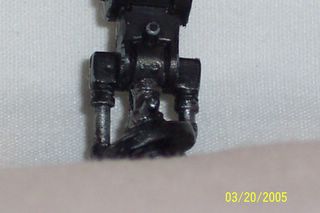
Legs


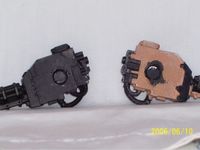
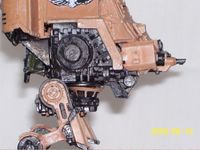
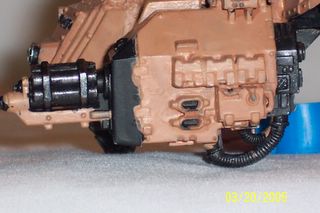
Left side (sorry about the angle)


Front (sorry about the glare)


Left side weapon

Sunday, February 20, 2005

2005-02-20 IG Dreadnaught

Good night of modeling. I was worried the piece would not come together but in the end everything seemed to work in my favor, knock on the plastic keys of this keyboard.

My intent was to keep the cab forward look of the sentinel and beef this up. I think I was able to do that.


I first glued the main power plant to the back of the IG dread. The power plant was again reduced in size but I was happy with the end result.


I cut some plastic cardstock to house the power plant.

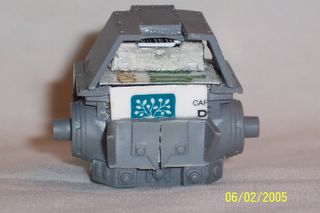
I cut the exhaust from the Dread in two added a small track shield that I cut down for the exhaust. I glued this to the side of the engine mount. Sorry about the picture.


I took one of the hatches from the tank spur and glued it to the top for a hatch.


To add some flash to the sides I glued the imperial eagle to the side of the additional armor.


Erik

Wednesday, February 16, 2005

2005-02-16 IG Dreadnaught

When Mars designed the weapons of my IG Dread they were to be a combination of the mass fire ideology of the Imperial Guard and rapid fire of a Gatling gun. This weapon was not an anti-armor weapon. This weapon only fires a little higher power beam than the stander hellgun.

This weapon does engage with a greater rate of fire, equaling the single shot of a squad of 10 men. The down side of such a rapid firing weapon is the accuracy of the weapon leaves little to be desired. The weapon usually can hit with its first shot the second coming close the following shots will start to drift according to the dispersal dice.


The barrel melt down factor is dispersed among the six electrically spun barrels. The power is dispersed among three quick charge batteries on the side of the weapon. This design is a known problem with the weapon. Reducing the number of quick charge and release batteries reduces the firing rate of the weapon. Two batteries reduce the rate to 6 shots one batter is only 3 and no batteries reduces the shooting rate to one.


The entire power plant is housed in the back of the IG Dread. This is a G7 fusion power plant housed in an armored shell.

Erik

Tuesday, February 08, 2005

2005-02-05 IG Dreadnaught

What a long time since my last post I have been thinking more that working on my IG Dread.

After the comparison pictures of the last post I started disliking my IG Dread more and more. Well I actually did not like the upper body just the legs. The legs looked stumpy. In comes the hack and slash. I liked the expanded lower shocks I put on my IG Heavy Sentinel (http://wh40k.blogspot.com/). I wanted to keep the quad shock of the dread so off with the hips. I cut the Dread hip connections off and pipes that hang off the hips to the lower hinge. On the upper joint there are two raised rectangle pieces on the front of the joint. I filed these flat to receive the cross bar from the Sentinel. I plan to add piping similar to the back leg section of the Sentinel.


I then cut off the lower legs of the IG Sentinel above the hinge point to the shocks. I then drilled a hole through the i-beam looking part of the leg through one of the joints. This did split that part on the sides and I will have to fill in the depressions on the side of the leg.

I have to give credit where credit is due. I was going to use some spare vindicator extra armor plate I had from the Heavy Sentinel but after I saw this model I decided to use the spare track armor from the tank accessory spure. I took the small on to give the leg a little armor but not overpowering plus the way the Dreads weapons fit I could not put these any higher up on the leg.

When I went to put the main body on the hip joints I found that it was to low. I cut the Dread hip swivel portion off the hips. I shaved off the swivel point sentinel and glued that onto the place of the swivel.


I have added some armor for the side of the cockpit. I envision this heavy armored IG Dread to be put at the apex of a line and just drill out with its weapons (still under customization) and dropping a lot of rounds on the enemy. Thus I want to insure that the Dread had side armor as well. This armor was cut from the mud flaps of a Lemun Russ tank spur.


I have also added some supports for the motor box I am going to custom build soon.


Ever since I recieved the Epic scale Imperial Titan I have wanted to use its back component as an exhaust for another machine. I have started by triming this down to go on top of the brackets I added pictured above.


When I did several hack and slashes I ended up with several little cut pieces I added these to the base for looks.


Erik


Sunday, January 09, 2005

2005-01-09 IG Dreadnaught

Well my first vision, a tandem seat cockpit on the inside of a dread body with dual weapons was a visual kerbaffel. When I was dreaming this up I thought I could trim down two Sentinel chairs and squeeze these into the body of the Dread, Wrong again! I could not even fit one in there nicely. Heck this thing started out being smaller than my Heavy Sentinel. I now have more respect when I see a Dread that has been customized with a SM or driver inside. The Heavy Sentinel and Dread are being held together with blue tack so forgive the off kilter look.


I started at the bottom feet first. Ever since I cut off all the toes of the feet for my Heavy Sentinel I knew I wanted to use them. Off with the toes and into the bits box. Well now was the time, I glued the feet of the Dread down to the base I had prepared last week. I then filed the corners off the inside of the sentinel toes to fit in between the Dread toes. Later I am going to use some more super glue to fill in under the feet.


I cut the top piece and the front piece to of the Dread to fit the trimmed down Sentinel cockpit to get these together. It turned out a single person could fit into the cockpit but then because of the superglue and angles I could not paint them, closed cockpit time. Super glue has been my friend and enemy.


In hindsight I wish I had just used the top from my Armageddon sentinel. If I choose to add another IG Dread to my army I will work a lot harder on the open cockpit.